Layers (digital image editing)
Layers are used in digital image editing to separate different elements of an image. A layer can be compared to a transparency on which imaging effects or images are applied and placed over or under an image. Today they are an integral feature of image editors.
In the early days of computing, memory was at a premium and the idea of using multi-layered images was considered infeasible in personal computer applications as the tradeoffs were image size and color depth. As the price of memory fell it became feasible to apply the concept of layering to raster images. The first software known to apply the concept of layers was LALF,[1] which was released in 1989 for the NEC PC-9801. LALF's terminology for layers is "cells", after the concept of drawing animation frames over-top of a stencil. Layers were introduced in Western markets by Fauve Matisse (later Macromedia xRes),[2] and then available in Adobe Photoshop 3.0, in 1994, which lead to wide-spread adoption. In vector image editors that support animation, layers are used to further enable manipulation along a common timeline for the animation; in SVG images, the equivalent to layers are "groups".
Layer types
There are different kinds of layers, and not all of them exist in all programs. They represent a part of a picture, either as pixels or as modification instructions. They are stacked on top of each other, and depending on the order, determine the appearance of the final picture.
In graphics software, layers are the different levels at which one can place an object or image file. In the program, layers can be stacked, merged, or defined when creating a digital image. Layers can be partially obscured allowing portions of images within a layer to be hidden or shown in a translucent manner within another image. Layers can also be used to combine two or more images into a single digital image. For the purpose of editing, working with layers allows for applying changes to just one specific layer.
Layer (basic)
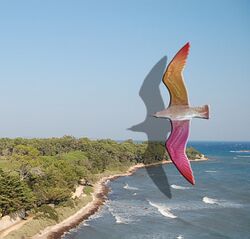
The standard layer available to most programs consists of a rectangular, semitransparent picture which may be superimposed over other layers. Some programs require that layers cover the same area as the final canvas, but others offer layers of multiple sizes.
 |
 |
Each layer may bear individual settings, such as opacity, blending modes, dynamic filters, and potentially hundreds of other properties.
 |
 |
Layer mask
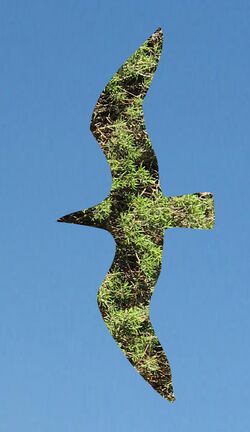
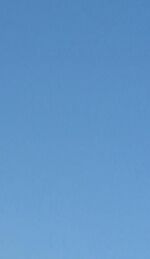
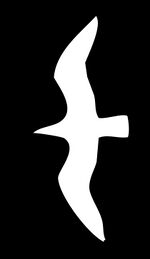
A layer mask is linked to a layer and hides part of the layer from the picture. What is painted black on the layer mask will not be visible in the final picture. What is grey will be more or less transparent depending on the shade of grey. As the layer mask can be both edited and moved around independently of both the background layer and the layer it applies to, it gives the user the ability to test a lot of different combinations of overlay.
 |
 |
 |
Adjustment layer
An adjustment layer typically applies a common effect like brightness or saturation to other layers. However, as the effect is stored in a separate layer, it is easy to try it out and switch between different alternatives, without changing the original layer. In addition, an adjustment layer can easily be edited, just like a layer mask, so an effect can be applied to just part of the image.

See also
- Alpha compositing
- Comparison of raster graphics editors
- Digital image editing
- Raster graphics
- Image processing
- Sprite (computer graphics)
References
- ↑ mit_u (13 December 2012). "ハイパー・グラフィック・ツール LALF (その2) -技術編-" (in ja). https://mit-u.hatenablog.com/entry/2012/12/13/213600.
- ↑ "Macromedia Matisse". 24 October 1996. http://pages.swcp.com/rtoads/vivisect/software/matisse.html.
 |

